In this project, I will talk about Soil Moisture Sensor and how can we save water in our home gardens by Interfacing Soil Moisture Sensor with Arduino and controlling the water supply to plants.
Introduction
If you have a home garden or a backyard with turf, then you might probably know how much we need to take with watering the plants and turf.
Garden Sprinklers are one of the frequently used options for watering the lawn and for plants, well, the only option and the best one is manual watering.
But if you are planning to make an Automatic Plant Watering system, where the water supply either through sprinklers or drip irrigation system, then you have to consider the amount of Soil Moisture.
By measuring the Soil Moisture in the garden, you can precisely control the amount of water to be supplied with the help of a simple mechanism involving a Water Pump and a Microcontroller.
In this project, I will show you how to monitor the soil moisture of a small pot by Interfacing Soil Moisture with Arduino
A Brief Note on Soil Moisture Sensor
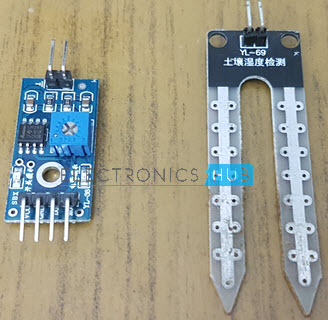
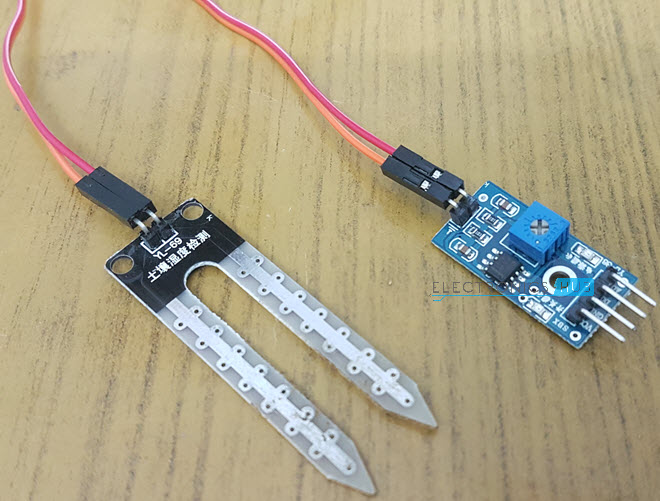
The main component of the project (apart from the Arduino UNO) is the Soil Moisture Sensor. It consists of two parts: The main Sensor and the Control Board.
Sensor part of the Soil Moisture Sensor consists of a couple of conductive probes that can be used to measure the volumetric content of water in soil.
Coming to the control board, it is made up of LM393 IC, which is a voltage comparator. The board also consists of all the necessary components like connectors, LEDs, resistors etc. to measure the Soil Moisture.
Additionally, there is an option to adjust the sensitivity of the module with the help of a Potentiometer.
Working of Soil Moisture Sensor
The working of the Soil Moisture Sensor is very simple. It works on the principle of voltage comparison. The following circuit will be helpful in understanding the working of a typical soil moisture sensor.
As you can see, one input of the comparator is connected to a 10KΩ Potentiometer while the other input is connected to a voltage divider network formed by a 10KΩ Resistor and the Soil Moisture Probe.
Based on the amount of water in the soil, the conductivity in the probe varies. If the water content is less, the conductivity through the probe is also less and hence the input to the comparator will be high. This means that the output of the comparator is HIGH and as a result, the LED will be OFF.
Similarly, when there is adequate water, the conductivity of the probe increases and the output of the comparator becomes LOW. The LED then starts glowing.
Interfacing Soil Moisture Sensor with Arduino
Now that we have seen how a typical soil moisture sensor works, let me take you through the steps of Interfacing Soil Moisture with Arduino. The main advantage of this soil moisture module is that you can get the analog output from it. By using this analog signal and giving it to the Analog IN of Arduino, you can precisely calculate the percentage of moisture in the soil.
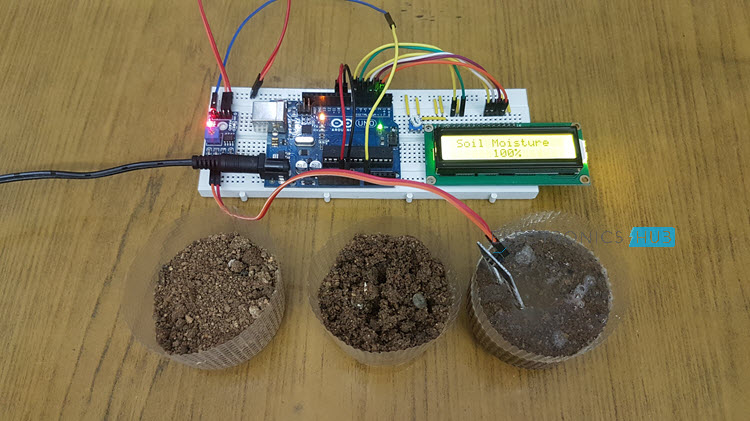
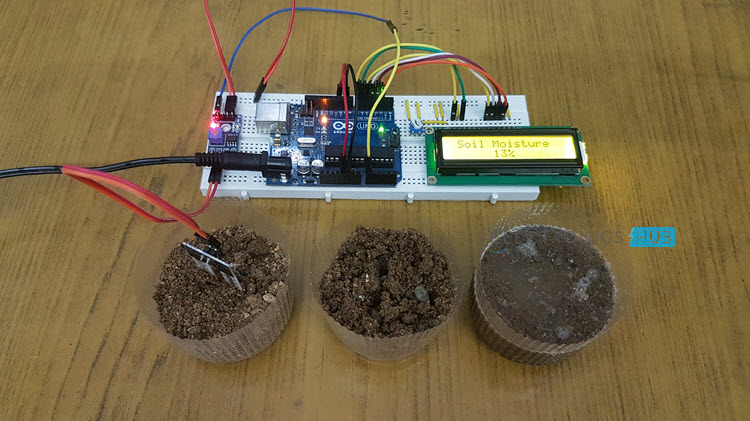
Coming to the setup for testing the project, I have used to plastic cups filled with soil from my garden. The amount of water in each cup is more than the previous one.
Circuit Diagram
Components Required
- Arduino UNO
- Soil Moisture Sensor Module
- 16×2 LCD Display
- 10KΩ Potentiometer (for LCD)
- Breadboard
- Connecting wires
- Power Supply
- Test setup with 3 cups of soil
Circuit Design
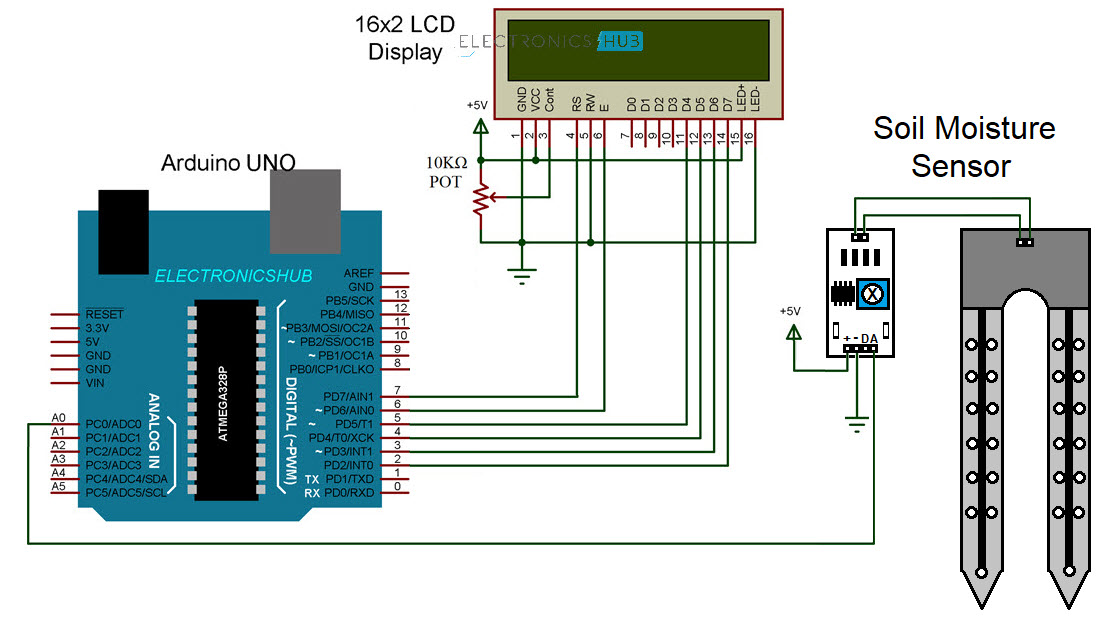
The design of the circuit is very simple. Connect the probe to the board and provide power supply to the board. Take the analog out pin from the board and connect it to Analog IN pinA0 of the Arduino.
To view the results, I have used a 16×2 LCD Display, where I have connected its data pins D4 – D7 to Arduino Pins 5 – 2. All the additional connections are mentioned in the circuit diagram.
Code
How to Measure Soil Moisture with Arduino?
- Make the connections asper the circuit diagram and upload the code to Arduino.
- Place the soil moisture probe in a “dry” pot and check for readings. In my case, it was around 13%.
- Similarly, place the probe in other pots (after properly cleaning the probe) and check for readings.
- You can adjust the sensitivity of the sensor with the help of the potentiometer on the board of the sensor.
Applications
You can use soil moisture sensor in
- Home Gardens
- Lawns
- Interior Plants
- Office and low light plant setup
The post Interfacing Soil Moisture Sensor with Arduino appeared first on Electronics Hub.
from Electronics Hub http://bit.ly/2GSvgQg

No comments:
Post a Comment